Autonomous spraying
Before starting to spray the orchard or other type of plantation autonomously with GOtrack AutoDrive system some steps need to be done.
SELECT IMPLEMENT
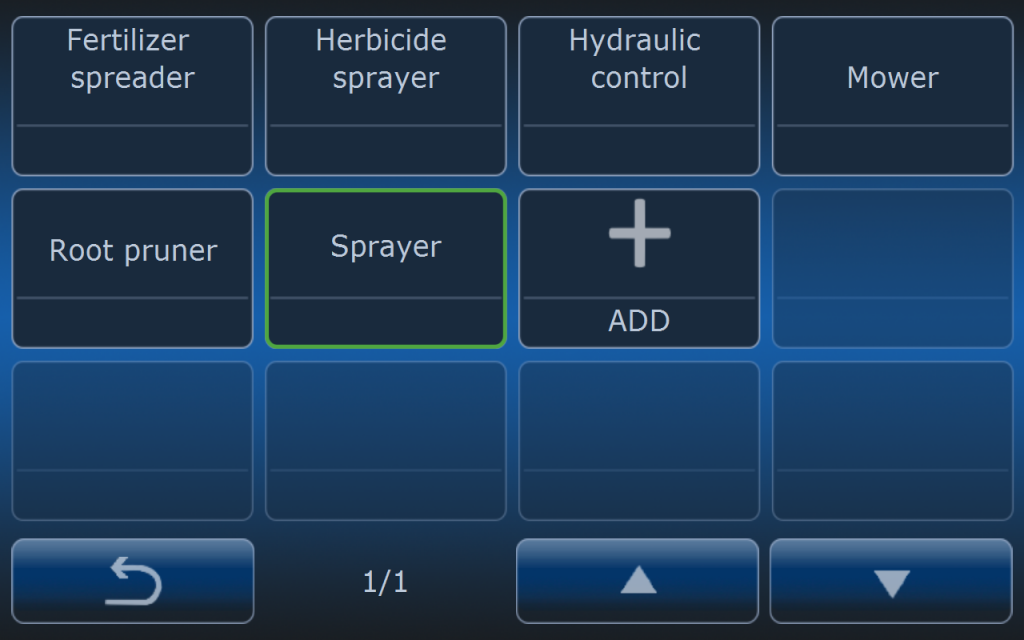
First step to be taken is selecting the right implement. When using AutoDrive system you can do select different type of the implements.
Present selection is shown by the green frame around the implement name.
IMPLEMENT SETTINGS
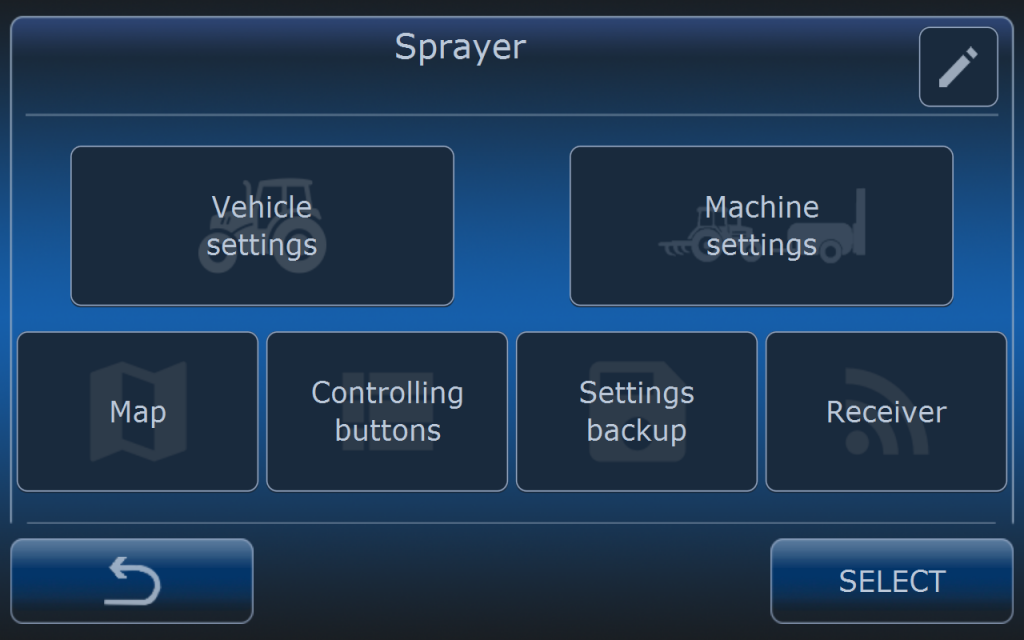
After selecting implement check all it’s settings in the implement menu.
Settings are divided into two main groups:
- Vehicle settings
- Machine settings
There are also some additional settings:
- Map
- Controlling buttons
- Settings backup
- Receiver
Depending on the system configuration different settings are available. Vehicle settings and machine settings are individual for the selected implement. It means that when another implement is selected then settings are changing too. Check article about implement settings where everything is explained.
Most important settings after selecting new machine are:
- Vehicle: speed, engine RPM, PTO and hitch,
- Machine: dimensions.
In genereal implement settings operator has options:
- Map – choose what vehicle or implememnt actions will mark the are on the map as completed,
- Controling buttons – select which buttons will be available on the main screen,
- Settings backup – settings backup,
- Receiver – if implement is controlled by GOtrack controler (blue box) then serial number must be typed in that menu for wireless connection with the controler.
ROUTE SELECTION

When proper implement is selected and RTK status is available then required route can be selected from the list of recorded routes (check article how to record the route).
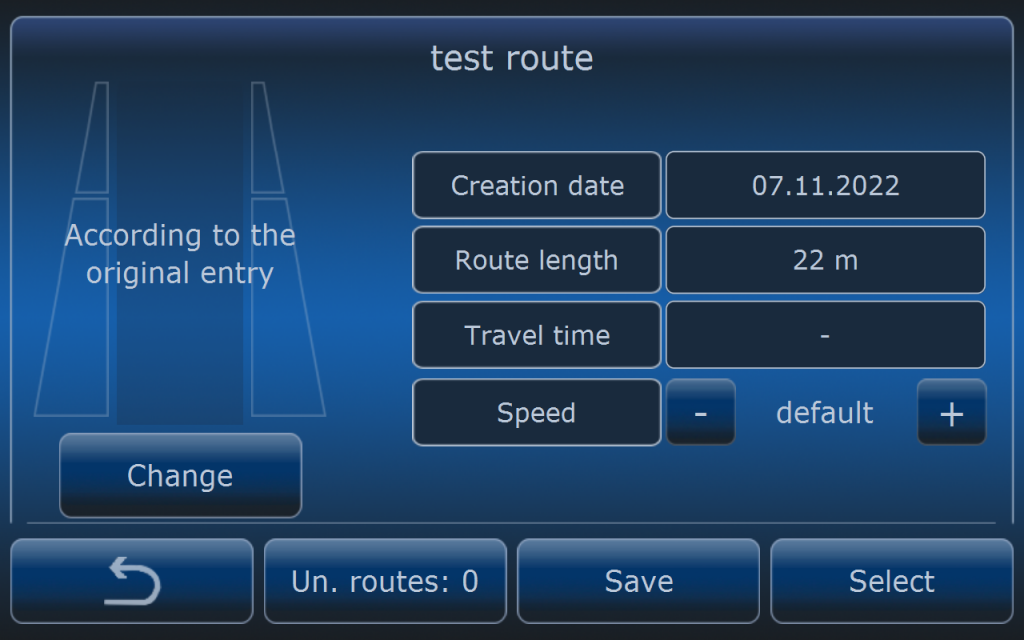
After selecting the route operator can see route summary screen.
If there is a need to set different speed especially for one run operator can do it on this screen by adjusting the speed with – and + buttons. Default speed means that speed value is taken from general speed settings for this type of the implement.
Press SELECT button to confirm route selcetion and settings.
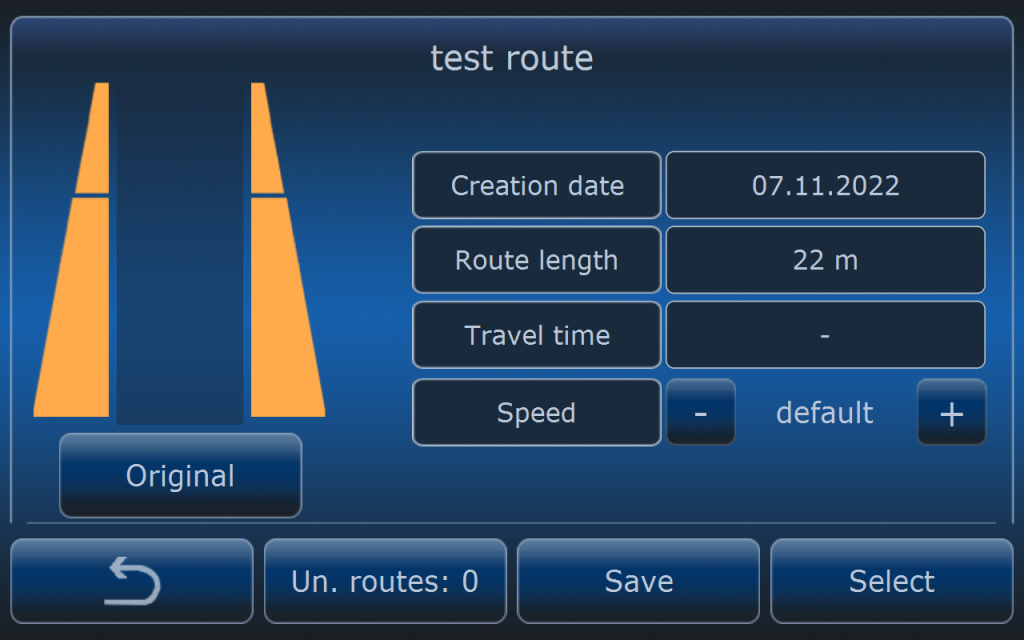
In case sprayer is selected there are some additional settings possible. For example when the route was recorded only with bottom sections opened (young trees) operator can change and mark bottom and upper sections to open both sections.
When the orginal route was recorded only with bottom sections opened and when operator marks now both 9bottom and upper) sections to open then every time at least one section at one side was opened, marked sections will open too. If none section was opened none will open too.

Individual route settings can be done only for one pass or they can be stored for next passes when pressing SAVE button.
Orginal route settings can be always restored after pressing ORGINAL button and setting speed to default.
GOING TO AUTONOMOUS MODE
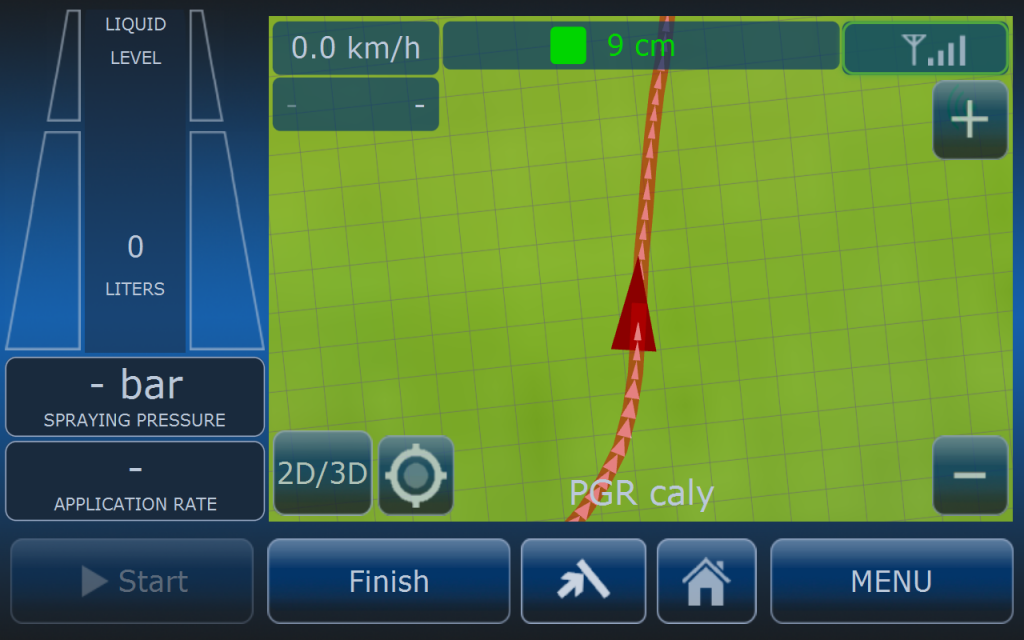
When route is selected on the home screen route paths will be visible. At this moment vehicle has to be placed on th the path. It can be anywhere but few conditions must be fullfilled:
- Vehicle has to be no further than safe distance to the path.
- Heading of the vehicle and route direction must be simillar.
- Vehicle has to be placed on the straight section of the path (not corner).
- Avoid starting in the place where another path is very close to the path you want the tractor to follow.
When the track is highlighted to the red colour it means that system is achored exactly to this part of the track. It means that after pressing START button system will follow highlighted track. It is very useful feature to easily recognize which track will be followed especially when there is more than one track in close neighbourhood.
STARTING AUTONOMOUS OPERATION
AUTONOMOUS READY MODE
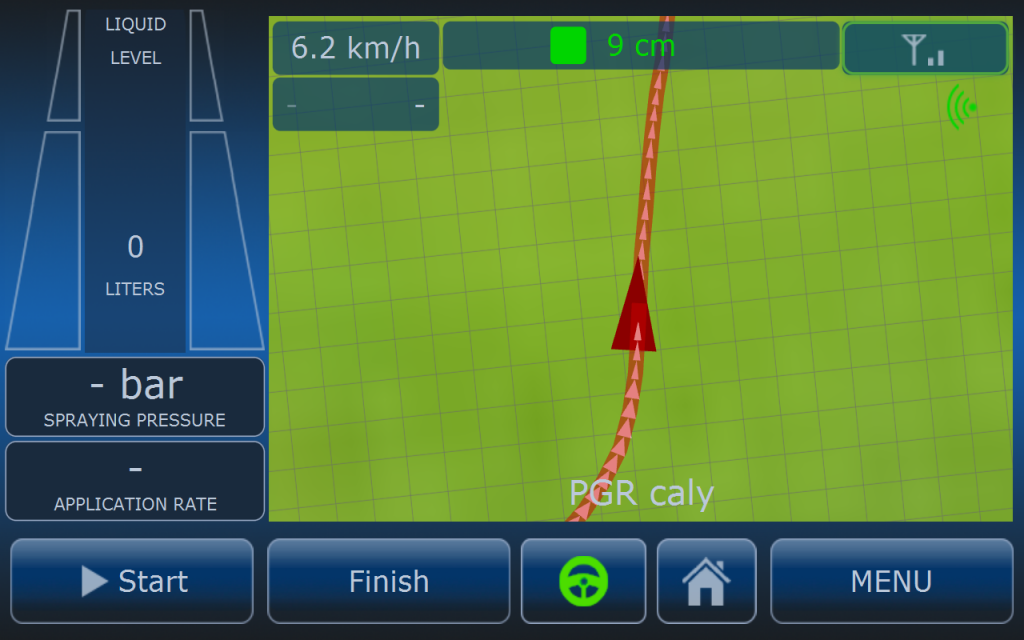
When all requirements are fullfield then steering wheel button on the bottom of the screen can be pressed.

After pressing steering wheel converts from grey to green which means system is ready for autonomous operation and START button is availabe. Clutch drive (if present) and brake drive will pull down pedals.

After pressing steering wheel button pedals (clutch and brake) will be pressed. At this stage operator has to choose demanded gear (if the transmission is manual) or set tractor to propper mode (if Fendt Vario tractor gen2. TMS mode must be off).
AUTONOMOUS DRIVING MODE
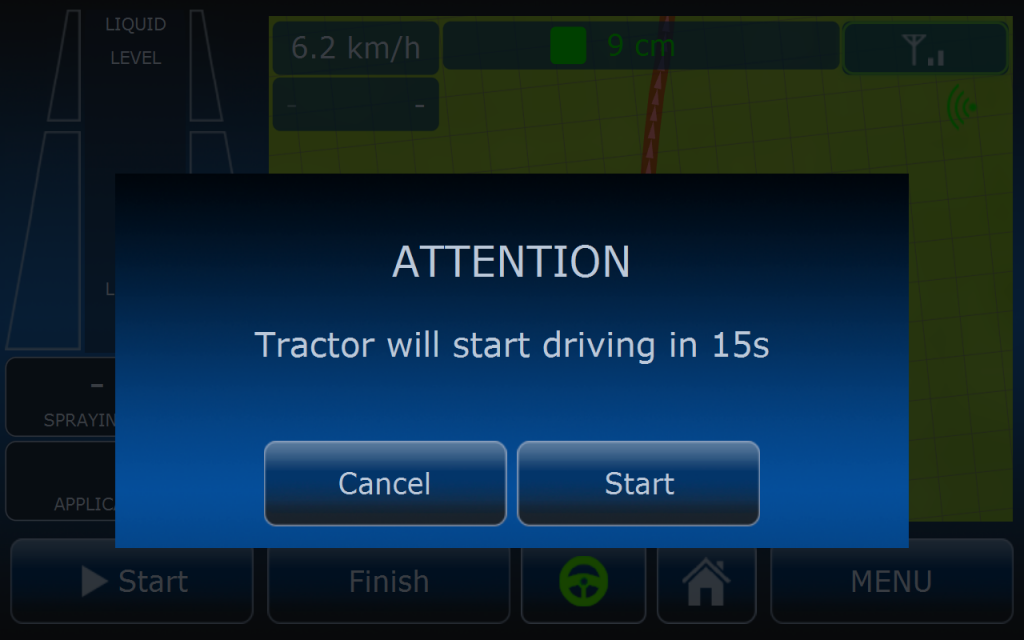
After pressing START button computer will start to countdown and after that time vehicle will start to drive autonomusly (clutch and brake drives will release pedals slowly).
Countdown time can be adjusted to operator’s needs and these settings are avilable in MENU > GPS > GOTRSCK GPS > SAFETY > STARTING.

It is very important to adjust drives’ forces and speeds accordingly to the vehicle and terrain. When driving on hilly terrain improper drive settings may cause vehicle will roll backwards before it starts to drive or it will not stop in the right moment.
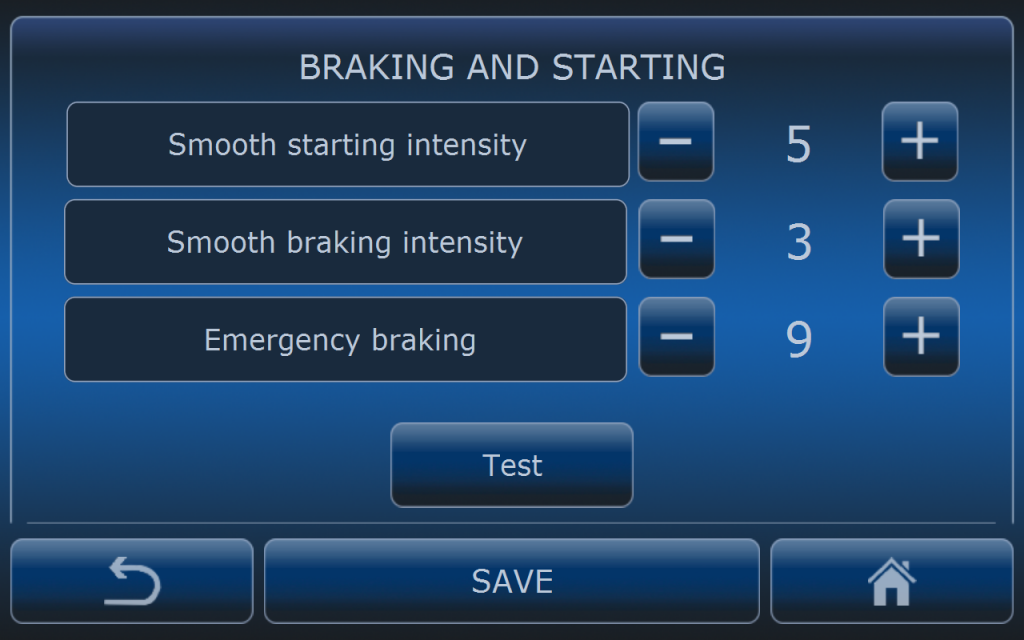
Brake drive speeds depending on the required action can be adjusted in the menu BRAKING AND STARTING.
Smooth starting intensity is the speed of brake drive used when starting to drive autonomously.
Smooth braking intensity is the speed of brake drive used when stoppin the vehicle at the end of the track or when pressing STOP button on the screen or in the GOtrack App.
Emergency braking speed is used when vehicle is stopped by the system because of safety reasons i.e.: too far from the path, low position precision, etc.
Drives can be also adjusted in the GOtrack configuration app after connecting the phone with MCU via Blootooth.
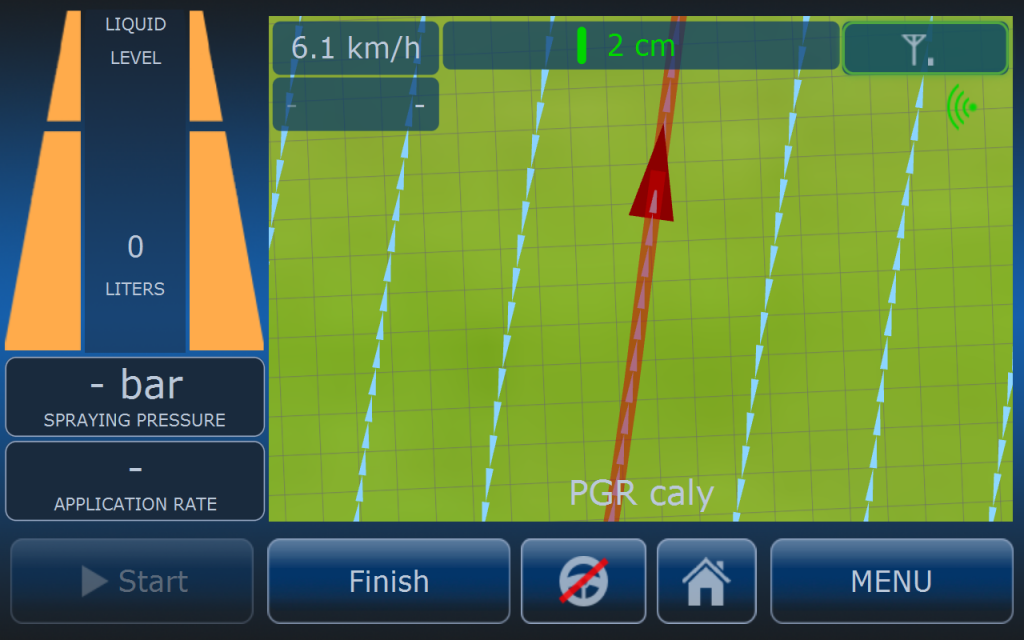
When vehicle is driving autonomously START button is replaced with STOP button which can be always pressed to stop the tractor anytime.
On the top of the map there is some status information:
- speed
- RTK precision
- path distance
- LTE signal
- camera temperature and status
By pressing speed icon operator has shortcut to speed settings where all basic settings related to speed are available.
By pressing RTK precision button operator can enter the menu with status of NMEA messages, RTCM list and GPS status.
Left side of the screen is dedicated to implement status. When sprayer is selected basic information about the sprayer is visible there: section status, pressure, application rate, etc. When pressing this area of the screen type of the information can be changed.
IMPLEMENT ERROR
When driving autonomously it is very important to stop the vehicle in case there is some implement error so application is continued with for example wrong application rate. GOtrack system offers few stopping scenarios in case of implement error or no communication with the implement.
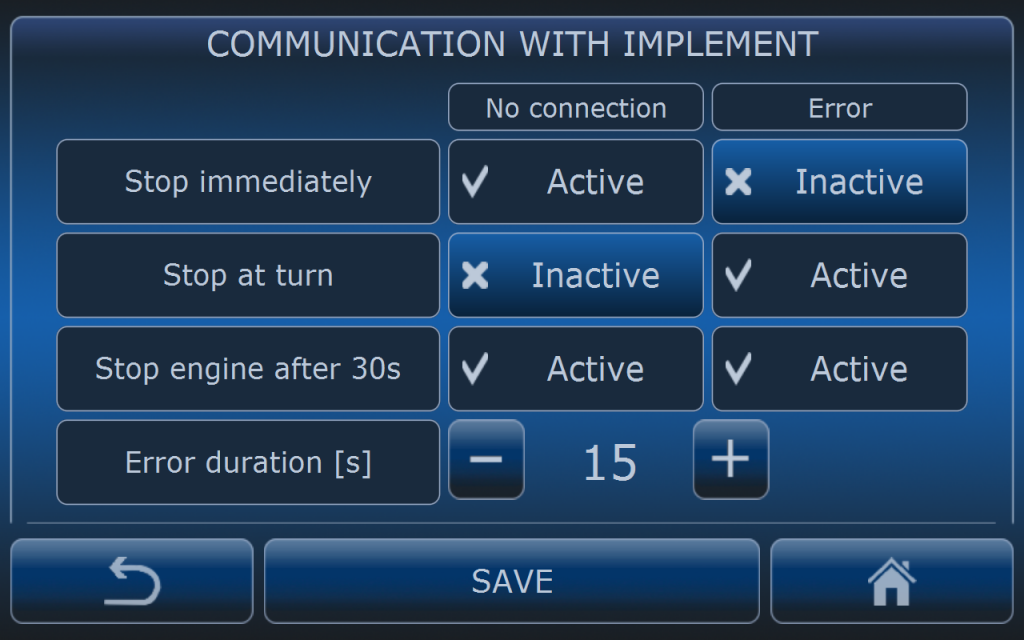
MENU > GPS > GOTRACK GPS >SAFETY > COMMUNICATION WITH IMPLEMENT
Operator can select different types of actions for No communicaction case or error case.
No communication is recoginzed when there is WiFi controler on the implement (i.e. sprayer), and copmputer cannot communicate with that controler.
Error is recognized when for example low pressure or wrong application rate error is present. When sprayer is selected tresholds for that errors are set by the operator.
With settings on the picture system will stop the tractor immediately when there is no communication with sprayer controler and will stop the tractor at the nearest curve when sprayer error is present. Both isuues must last for at least 15 seconds. When tractor is stopped then after 15 seconds engine will be switched off.
INTERRUPTING AUTONOMOUS DRIVING
When vehicle is driving autonomously it can be stopped any time operator wish to do it (for example in case of sudden weather change). Stopping can be done in few ways:
- by GOtrack app
- by SMS by sending STOP command
- from the computer’s screen
- with the remote controler (by moving joystick down) when RC is in range of the vehicle (not more than 20 m)
- with emergency buttons (only in case of emergency)
- by pressing the bumper (only in case of emergency).
After stopping the vehicle engine will not shut off automatically. Operator can resume autonomous driving using the same methods like above.
Autonomus driving can be also interupted to replace vehicle manually into another part of the route. Then when vehicle is stopped operator has to enter the cab and put GOtrack system into MANUAL mode by pressing and holding for 3 seconds pedals relese button on the screen or on the GOtrack smart panel.

Before switching system into manual mode gear switch lever must be in neutral position and clutch and brake pedals must be pressed by the operator until operation will be finished.
When pedals are released and system is in the MANUAL mode vehicle can be driven manually to desired location of the path. If that location is reached, distance to the path and heading conditions are met after pressing steering wheel button system will switch again into AUTONOMOUS READY mode. Then after pressing STRART button vehicle will start to drive autonomously again.
If there is a need just to finish autonomous driving before reaching the end of the route after puting system into MANUAL mode FINISH button has to be pressed to close the route.
END OF THE ROUTE
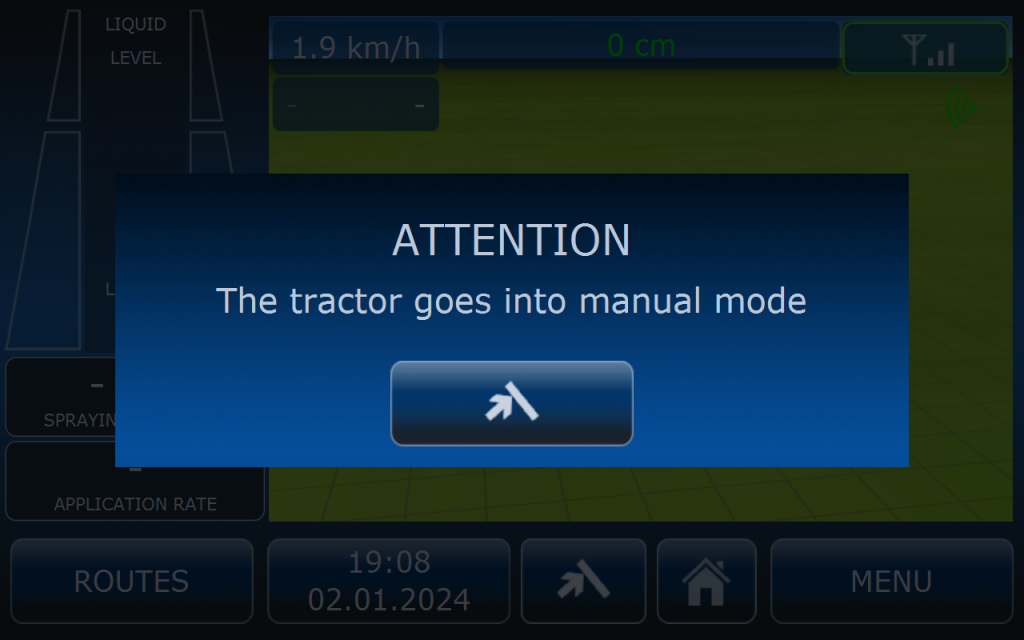
When the route is finished vehicle will stop at the end of the route and this popup screen will appear. Put the gear lever into neutral and press and hold the button to release pedals. System will switch to manual mode.
