Calibration after AutoDrive system installation
After installation of AutoDrive system there are few steps to be done for calibrating the system.
ANGLE SENSOR
The best way to calibrate angle sensor is to use GOtrack Configuration App which is available for downloading at www.gotrack.pl/download
GOtrack Configuration App is developed only for Android phones. During installation you have to accept that the app is from unknown source. It may happen that the app will not work after installation. Most frequent reason of that issue are permissions. This app need location permission which has to be allowed in Android system. How to change permissions it is described here https://support.google.com/android/answer/9431959?hl=en
When the app is already installed first screen is device list. Please select device from the list. When other systems are ON in close neighbourhood the app will list all of them. It is better then to switch off other system to avoid mistakes with connecting to wrong device.
When the app is connected go to ANGLE SENSOR menu.
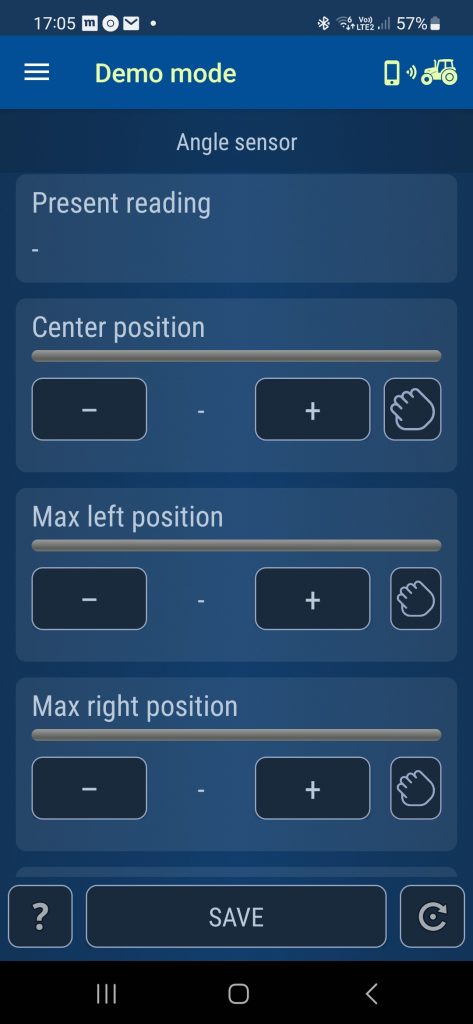
The ANGLE SESNOR menu is for calibrating angle sensor. When tracotr is running and system is on PRESENT READING should be visible.
Calibration of angle sensor requires to save 3 positions of steering wheels: max left, center and max right.
Please move the steering wheel to each position and press GRAB button to copy present reading to the calibrated position.
When finished press SAVE button
ENCODER CALIBRATION
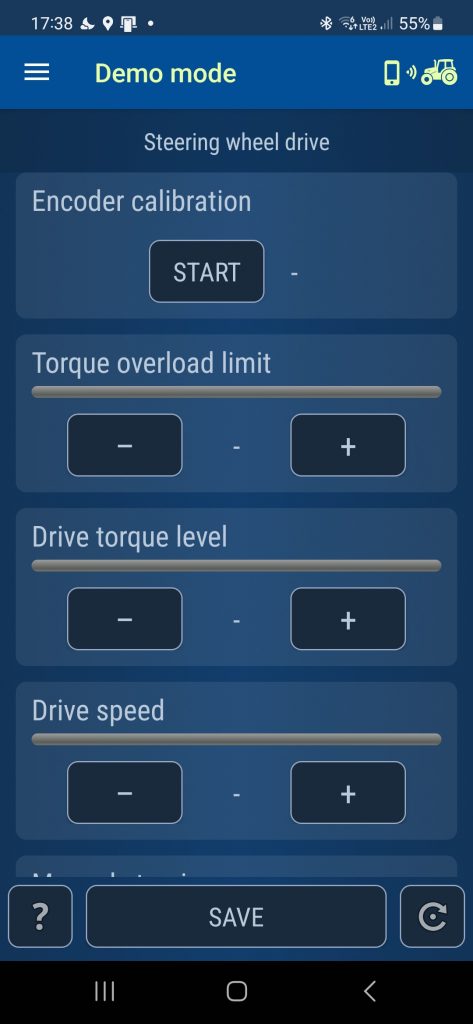
Next step of calibration is ENCODER calibration in STEERING WHEEL DRIVE menu.
Turn steering wheel max left and press START button and turn steering wheel max to the right. When max right position is reached then press STOP button. After calibration there should be some value visible here. Usually encoder value is above 500 and below 800. It depends on the range of steering wheel system.
The rest of settings has to be done in the GOtrack computer.
RECEIVER TYPE
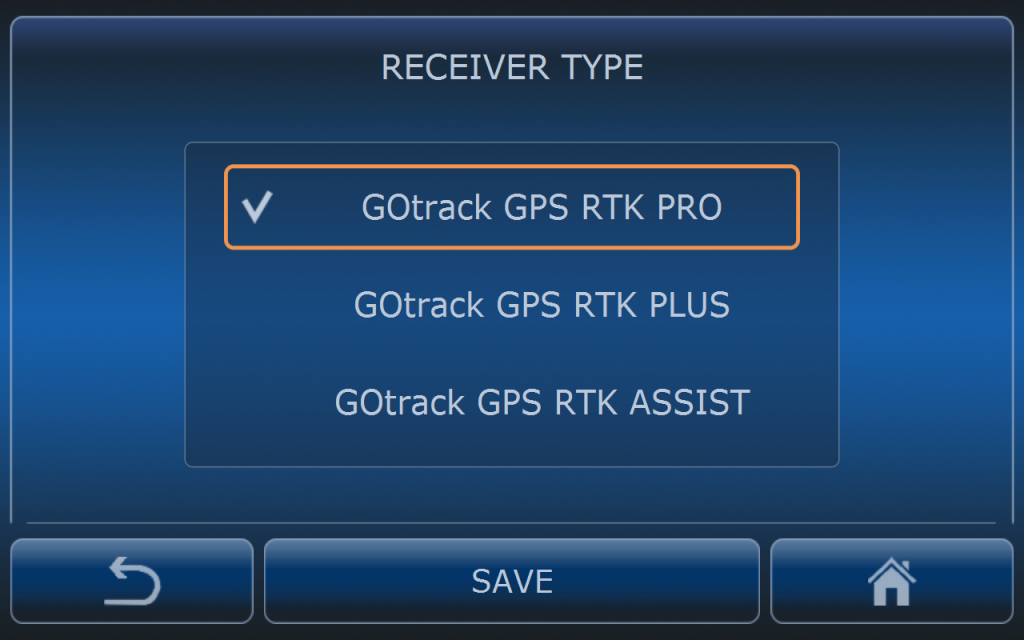
For AutoDrive systems GOtrack GPS RTK PRO receiver has to be selected.
Other types of the receiver are used not for AutoDrive systems like GPS Assist system.
ANTENNA ORIENTATION
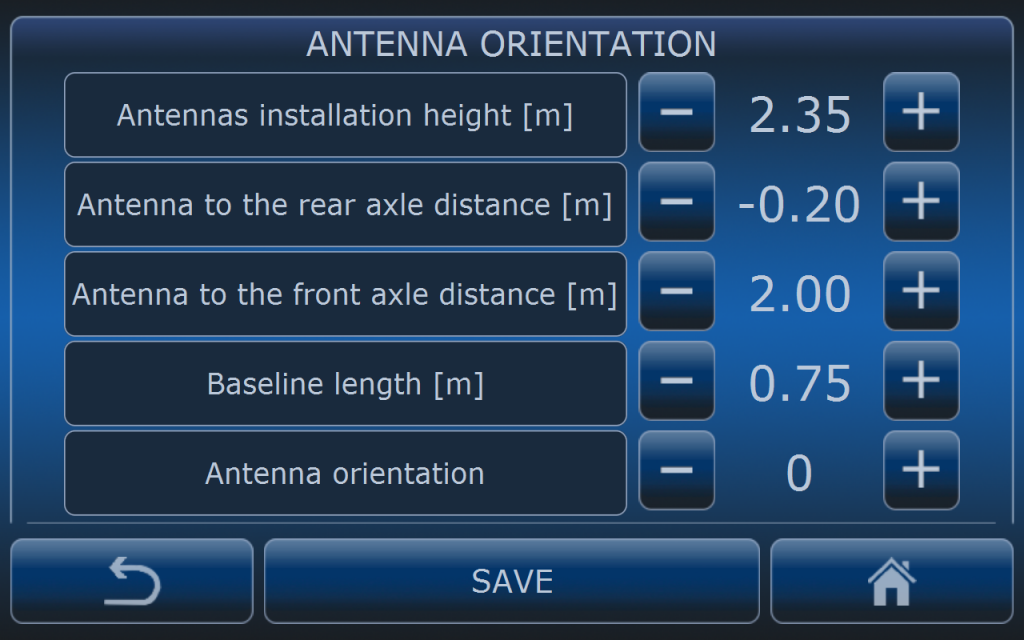
Antenna orientation determines the psoition of the antenna bar on the roof. It is very important to fill these vaules just after installation of the system. Please provide correct measurements and values in this menu so the rest of the calibration porcess will be will be done properly. Wrong values will strongly affect calibration process.
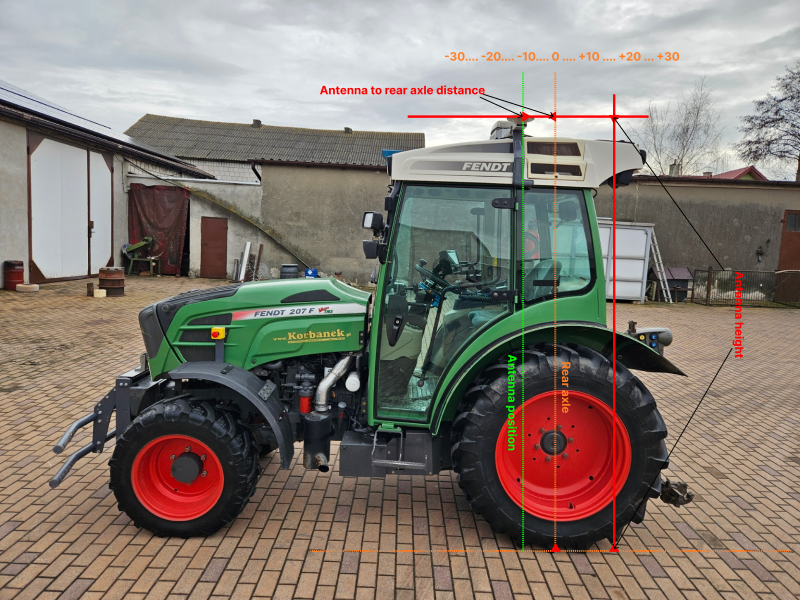
Antenna height has to be measured from the ground to the antenna bar.
Antenna to the rear axle distance is measured from the center point of the antenna bar to the rear axle. When antenna is located between the rear and front axles then these values must be negative. When antenna is located behind the rear axle then this value must be positive. On the picture above antenna is located 20 cm from the rear axle towards front axle.
Antenna to the front axle distance is simillar to the rear axle settings but all measurments are done to the front axle.
Baseline lenght is the distance between the center points of the antennas. Usually antenna distance is 1m or 0.75m but there might be some other variants. Please check the distance after during installation.
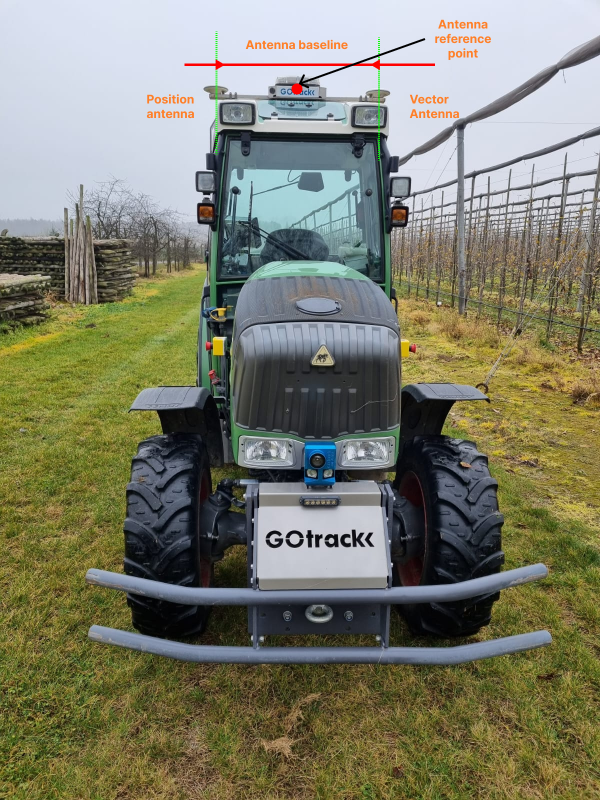
Antenna orientation depends on the installation on certain vehicle. On some vehicles it is recommended to install the antenna East-West but when system is used on very narrow tractors then it is good to consider installation in North-South position. There are 4 options for antenna orientation. 0 and 180 is for E-W orientation and 90 and 270 is for N-S orientation. Please check markings on the antenna bar. When antenna is N-S or S-N oriented then it is important to remeber that reference point is the the center of the antenna bar. See picture above.
It is easy to recognize if the antenna orientation is propper when trying to record new route. When vehicle icon orientation is in proper oreintation with the route then settings are ok.
IMU CALIBRATION
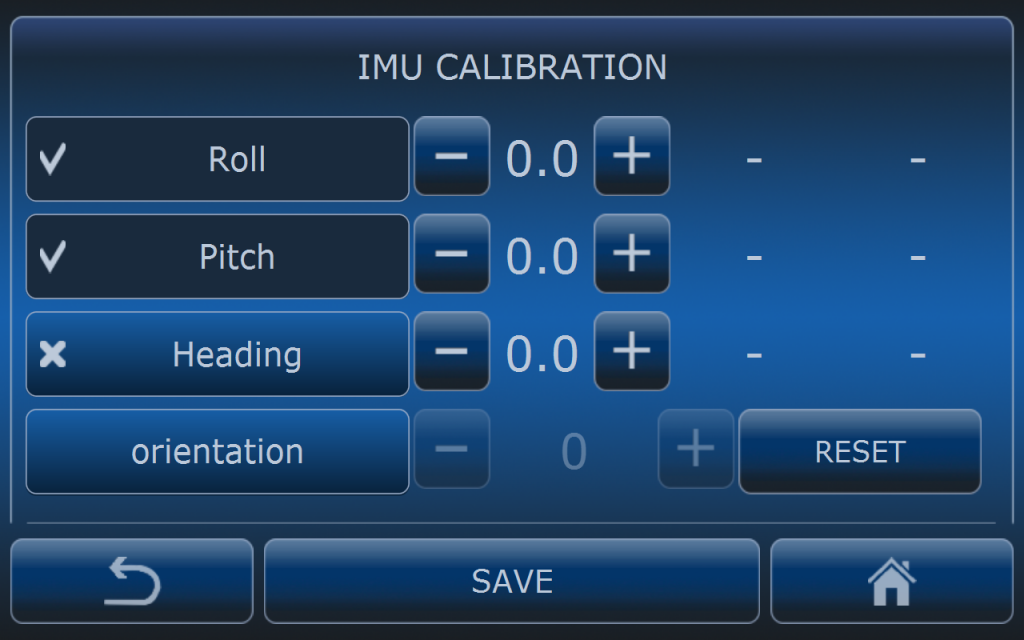
System is equipped with inertial sensor which is compensating vehicle pitch and roll. It is very important to calibrate IMU sensor before using the system. Otherwise routes recorded with the system on one tracotr will not suite to another one. Also routes generated on the server will be not compatible and route offset can be present.
For IMU calibration vehicle has to be placed on the flat and horizonatl surface (for example in the workshop) and vehicle engine must be off. When it is ready for calibration using – and + buttons set the same value which is visible in the second column which represents raw readings. Do it separately for ROLL and PITCH. When it is done press SAVE button and enter this menu again to check if in the third column readings are equal to 0.
AUTOCALIBRATION
GOtrack AutoDrive system has very simple algorithm for autocalibrating steering system after AutoDrive installation. Before starting the process of autocalibration all settings above must be done properly.
When everything is ready autocalibration process can be started.
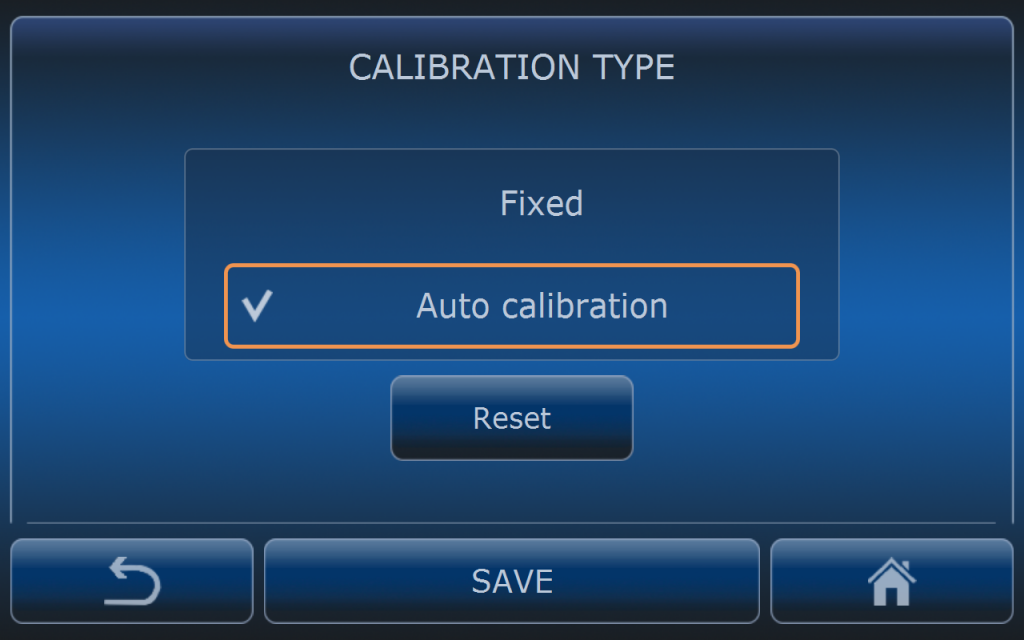
By default autocalibration is ON but it is good to check if all settings are ok and this functionality is active. Go to MENU > GPS > GOTRACK GPS > SYSTEM CONFIGURATION > STEERING SYSTEM > ALGORITHM CALIBRATION > CALIBRATION TYPE and check if it activated.
Fixed calibration is done for every calibration point separately and it is not adjusting dynamically when using AutoDrive. Normally there are 14 calibration points. This method is also not resistant for angle sensor decalibration after some time of using the system.
Autocalibration is much faster because for the beginning only few calibration runs are needed and the rest of calibration will be done during the normal system operation. It is dynamic so system is calibrating all the time while driving. It is also resistant to sensor decalibration after some time of using the system.
To start autocalibration all steps described above must be done and RTK status is active. Autocalibration is done only in RTK mode. If precison is lower then measurments are not taken into consideration.
Minimum for calibrating the system is to drive few times with wheels turned max left, few times with wheels turned max right and approximately 100m straight ahead so angle sensor readings are between -100 and 100.
During calibration from time to time new vertical bars will appear on the graph in Autocalibration Statistics menu. It means that calibration was done in this range. More vehicle is driven more bars will be present on the statistics graph.
If system is calibrated for the first time and you can see in statistics menu that graph is filled in with vertical bars probably reset of autocalibration is needed.
If some repair actions with steering system (front axle) were performed or angle sensor was changed all steps above have to be repeated and calibration has to be reseted.