Route recording – spraying
AutoDrive system is able to drive autonomously on pre-recorded or generated routes. These routes must be compatible with AutoDrive system.
Routes are assigned for certain implement type (sprayer, mower, etc.) separately. It means that routes recorded when sprayer is selected are not visible for mower.
Depending on the selected implement and tractor equipement during recording AutoDrive system will memorize in the every point of the route file all possible statuses of each possible feature. For example:
- PTO status: ON or OFF,
- hitch position: working position or transport position (down and up),
- sprayer section status: ON or OFF,
- for some vehicles hydraulic outputs statuses can be also memorized.
BASIC RULES
When recording routes there are basic rules that must be met:
- GOtrack (remote control system) must be ON. Turn it on with smart panel. Pedals must be released (blue LED is on).
- system is fully calibrated after installation,
- IMU sensor is calibrated especially for zero position after installation or IMU sensor replacement,
- GNSS receiver is in RTK mode and the precision is higher then selected in the SAFETY menu,
- Gotrack computer has Internet connection,
- planned route is not under the tree canopies or close to high trees or other type of structures that may interfere and reflect GNSS signal,
- field must be fenced so when playing back the route vehicle will drive inside fenced area.
Driving style
- operator must not drive backwards when recording. When driving backwards is recognized then recording will be automatically paused. Plan your route before recording,
- turns must be recorded with max 80% of steering angle range so AutoDrive system is able to make corrections when playing back the route in slippery conditions,
- try not to make sharp angle changes when making turns
- when recording is paused (low GNSS precision or operator did a mistake and correction is needed) it is possible to continue recording only from straight sections of the route. Place the vehicle closer than 10 cm and parallel to the recorded route. If the distance is greater than 10 cm, the computer will prevent “sticking” the route to the one already recorded.

Do not record the routes on public roads or roads which are not located in fenced areas under operator’s control.
IMPLEMENT CONTROL
Remember to set proper implement dimensions in the IMPLEMENT SETTINGS menu. Critical setting is DISTANCE TO THE IMPLEMENT which represents the distance to the working element of the implement. This distance should be measured from the rear axle to the working element of the implement. For example when trailled sprayer is selected then working element is the part of the sprayer where nozzles are located. It means the distance can be for example 4 – 5 meters. When mower is selected then the distance should be measured to the center of the mower (knife rotation point). This distnace is important when changing implements with different dimensions. When settings are not ok then improper implement activation can be experienced (i.e. nozzles can open or close too early or too late).
Route recording process is done by a normal vehicle drive through the plantation with the implement. While driving, e.g. with a sprayer, the GOtrack computer controls the machine according to the spraying program that has been selected. In addition, while driving, the route is stored and all actions taken by the operator related to switching on and off, in this case, the sprayer section.
STEP BY STEP MANUAL
ROUTES MENU
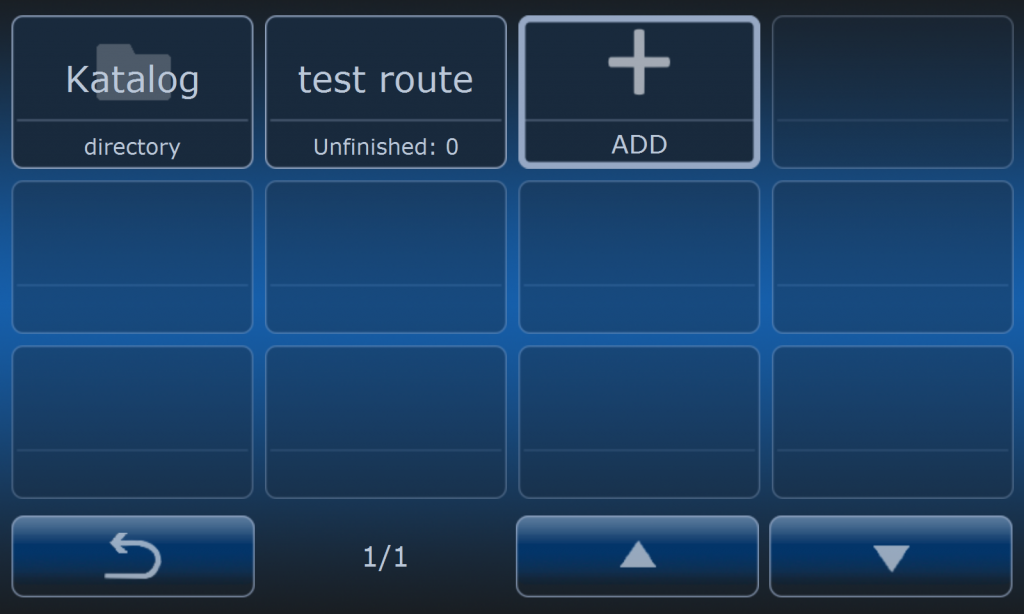
Enter ROUTE menu and press + button.
SELECTING ROUTE RECORDING
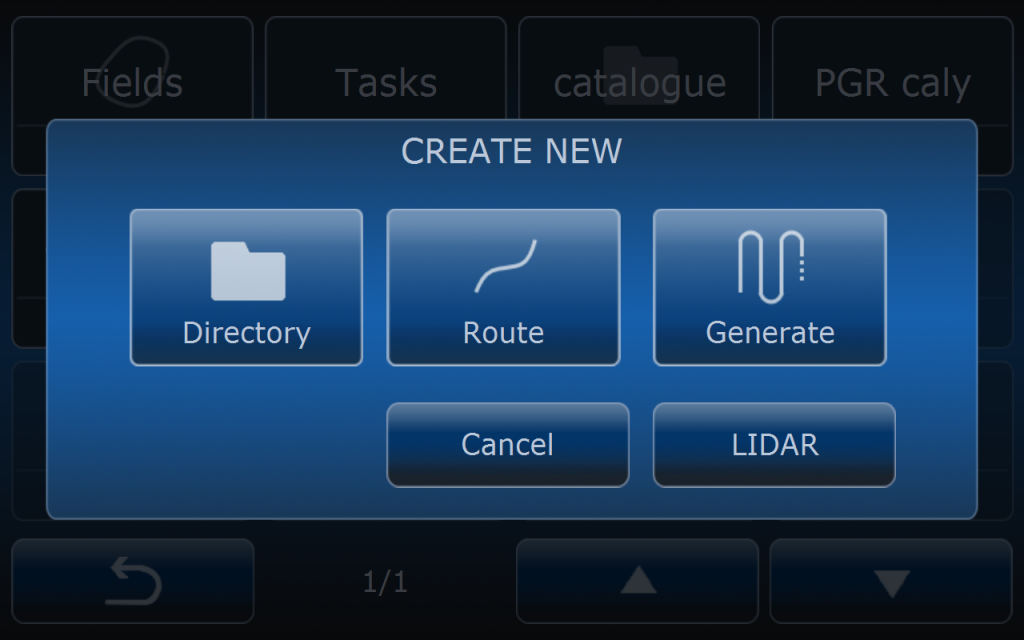
After pressing + buton operator has choice of selection: Direcotry, Route and Generate.
Press ROUTE button.
START RECORDING
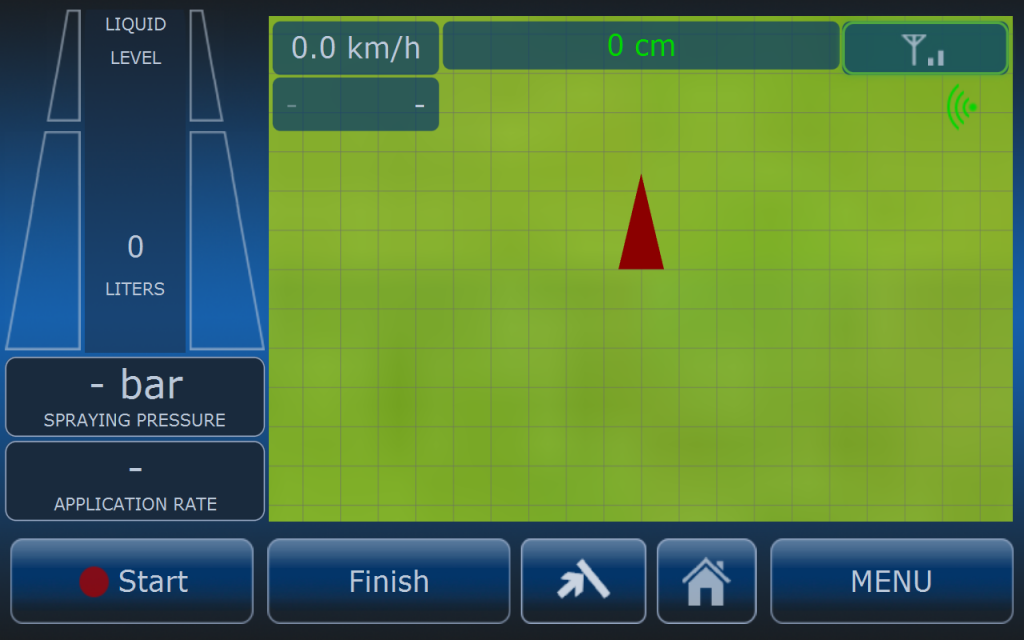
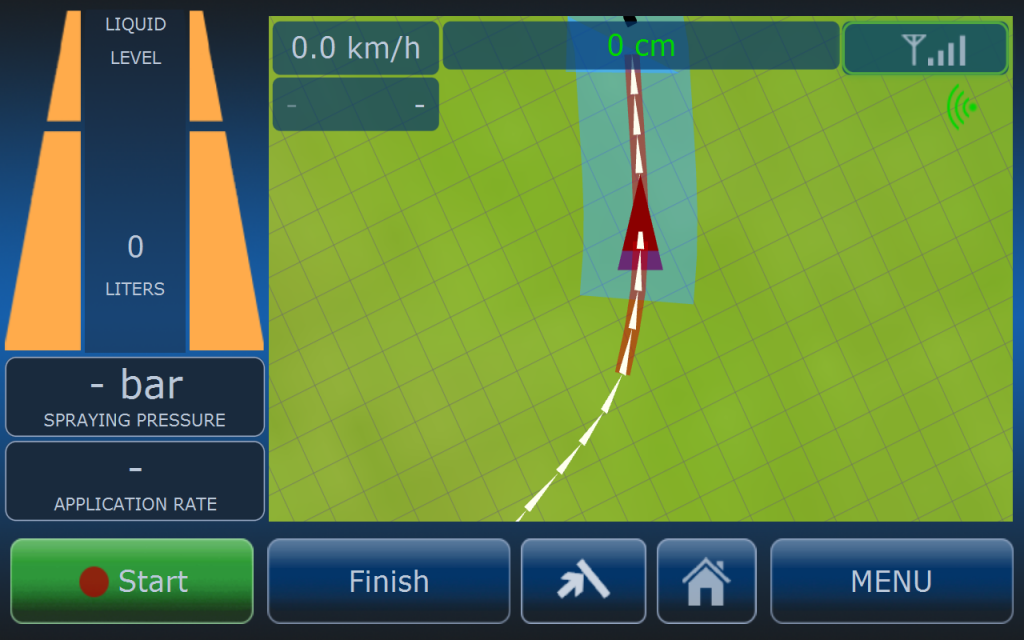
A screen with a map view will appear and the buttons START and FINISH will be
available under the map. After pressing the START button recording will be started.
After pressing the START button the button will change its function to PAUSE .
RECORDING WITH IMPLEMENT
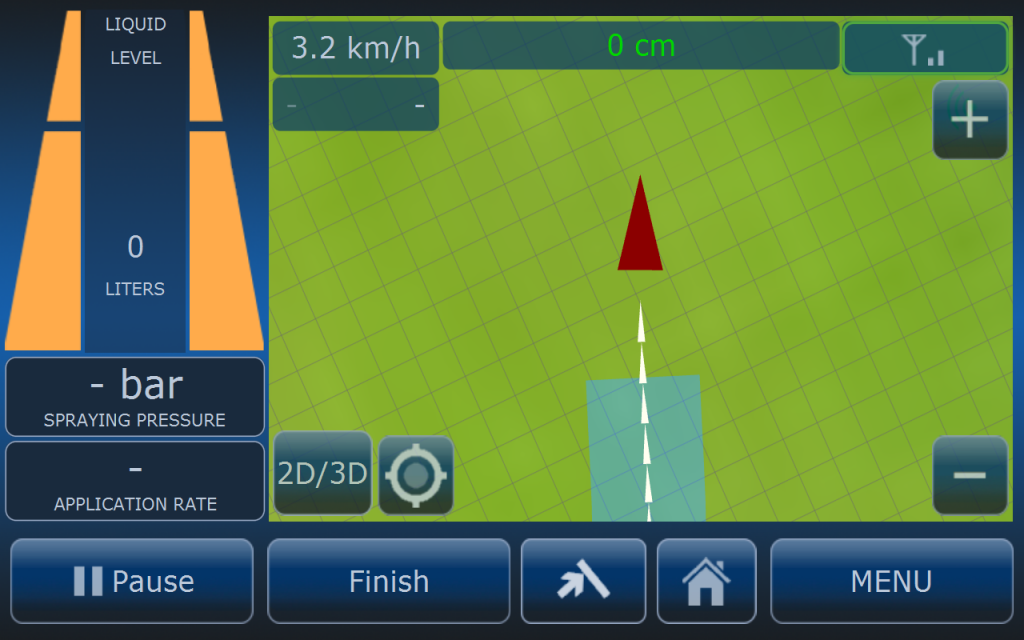
While driving, the route and all actions that operator performs with the implement are
memorised.
GNSS OR RTK LOSS

If the GNSS signal or RTK precision is lost, the computer will signal this fact with an acoustic alarm. The route recording will then be automatically interrupted in exactly the same way if the operator presses the PAUSE button. In this situation, the user has two options:
A. wait for the GNSS signal to be restored and continue recording the route from the last recorded section.
B. save the recorded route and continue recording another time or day.
If the GPS signal or RTK precision is restored, move the vehicle / tractor back to the
section of the route where you can see the end of the route and place it as close as
possible to the recorded route. To ‘stick’ the route to the one already recorded, the
distance between the vehicle and the old route must not be greater than 10 cm. The
ability to continue recording the route and correct placing of the vehicle will be
indicated by the green color of the START button.
CORRECTING MISTAKES
If the operator makes a mistake while recording the route, this process can be stopped by pressing the PAUSE button (the PAUSE button will turn into START ) and then return the vehicle to the section of the route from which the correction is needed. Please note that it is necessary to place the vehicle as close as possible to the existing route (no more than 10cm). If the condition of the distance from the route, at the point from which the route correction will be made, is met, the START button will light up in green. After pressing START button driving and recording the route can be continued. The old section of the route recorded after the point from which correction was started will be deleted.
END OF THE ROUTE
The end of the route should be planned at the place where the operator wants the vehicle to stop after completing its work. After reaching the end of the route, press FINISH button. A screen will then appear where you must enter the name of the route where it will be saved on your computer. In addition, user can enter a different speed than the default (set in the menu). If no speed is specified here, the speed will
be set to the default level for selected implement during route playback. This speed can be changed later when editing the route settings.
It is recommended to plan the end point on the flat terrain so when vehicle stops at that point and engine is off vehicle will not roll down the hill.